Introduction to App Canvas
What is app canvas?
App Canvas is a feature that allows apps to define custom user interfaces within Benchling. Interactive Benchling apps can use “blocks” to build custom interfaces that appear in Benchling, allowing users to interact directly with the app. Best of all, Canvas UIs update in real time, so no waiting and refreshing the page is necessary to get feedback from a Benchling App.
Currently, app canvases can appear in two places: On an app’s homepage, and within interactive runs. While the functionality of the canvases is the same in either location, they typically support distinct use cases:
- App homepage canvases are often used for apps that require advanced configuration, or configuration options that vary between tenant installs. App homepage canvases are also common for apps that support “global” actions and settings.
- Interactive run canvases are generally used when an app needs to insert a user interface into a notebook entry. This can involve using a lab automation run alongside the canvas UI, or the run can act as “container” to hold the canvas UI (without functioning as a traditional run)
How to design interactive apps
Benchling Apps can vary significantly in complexity and functionality, but most follow the same basic patterns. App Canvas allows for the design of interactive apps, which have some more stringent design requirements. A prototypical interactive app has three key design components:
App manifest w/ features defined
While a manifest isn’t required for all Benchling apps, it is required for interactive apps that leverage a canvas. An interactive app will define some number of “features” where a custom UI will be provided. Distinct features typically serve distinct purposes, and an interactive app can define as many (or as few) features as appropriate.
Public endpoint to support webhooks
Webhooks are a key component of interactive apps; canvases trigger a variety of app signals that are sent as webhooks including canvas initialization and button click events. Apps using canvases must therefore be able to receive webhooks from Benchling; check out our Getting Started with Webhooks guide for more details.
Application logic for interacting with canvas
Interactive apps define custom user interfaces using canvas blocks, and use the Canvas API to update the canvas contents. Benchling then renders the components in the canvas in realtime. Apps must be capable of responding to canvas webhooks by querying and updating the canvas(es) in question to produce the desired user experience.
How to use app canvas
To use app canvas, your app must be installed from an App Manifest Reference. An interactive app must define one or more features where a user can choose to render an app canvas. Currently two types of features are supported: ASSAY_RUN features that introduce a canvas to an interactive run, and APP_HOMEPAGE features that introduce a canvas to the app’s homepage. An app's features as defined in the manifest might look like this:
features:
- name: Interactive Run Feature
  id: test_interactive_run_feature
  type: ASSAY_RUN
- name: App Homepage Feature
  id: test_app_homepage_feature
  type: APP_HOMEPAGE
Each field listed is required:
- The
namefield is the user-facing name of the feature - The
idfield is the app-defined unique identifier for the feature - The
typefield denotes where the feature is available; currently, only theASSAY_RUN(corresponding to interactive runs) andAPP_HOMEPAGEtypes are supported
Canvas Initialization
With an ASSAY_RUN feature defined, admins will have the ability to select run schemas where the canvas will appear. This option can be found in the app’s configuration interface; for interactive runs, the user will be able to select a number of run schemas where they would like the UI to render:

When an instance of these run schemas is created in a notebook entry, an initialization webhook will be sent to the app:
{
  "app": {
    "id": "app_gh8DciACwgm6CtIi"
  },
  "baseURL": "https://piproduct.benchling.com",
  "channel": "app_signals",
  "message": {
    "canvasId": "cnvs_0IYfHKi4",
    "deprecated": false,
    "excludedProperties": [],
    "type": "v0-beta.canvas.initialize"
  },
  "tenantId": "ten_rhp9gje5mg",
  "version": "0"
}
App Homepage features work slightly differently; instead of being created alongside an object (like a run) the initialization webhook for an app homepage canvas is sent when the app is activated. The app homepage canvas initialization webhook should arrive shortly after the app install webhook (see the lifecycle section of App Configuration for more details).
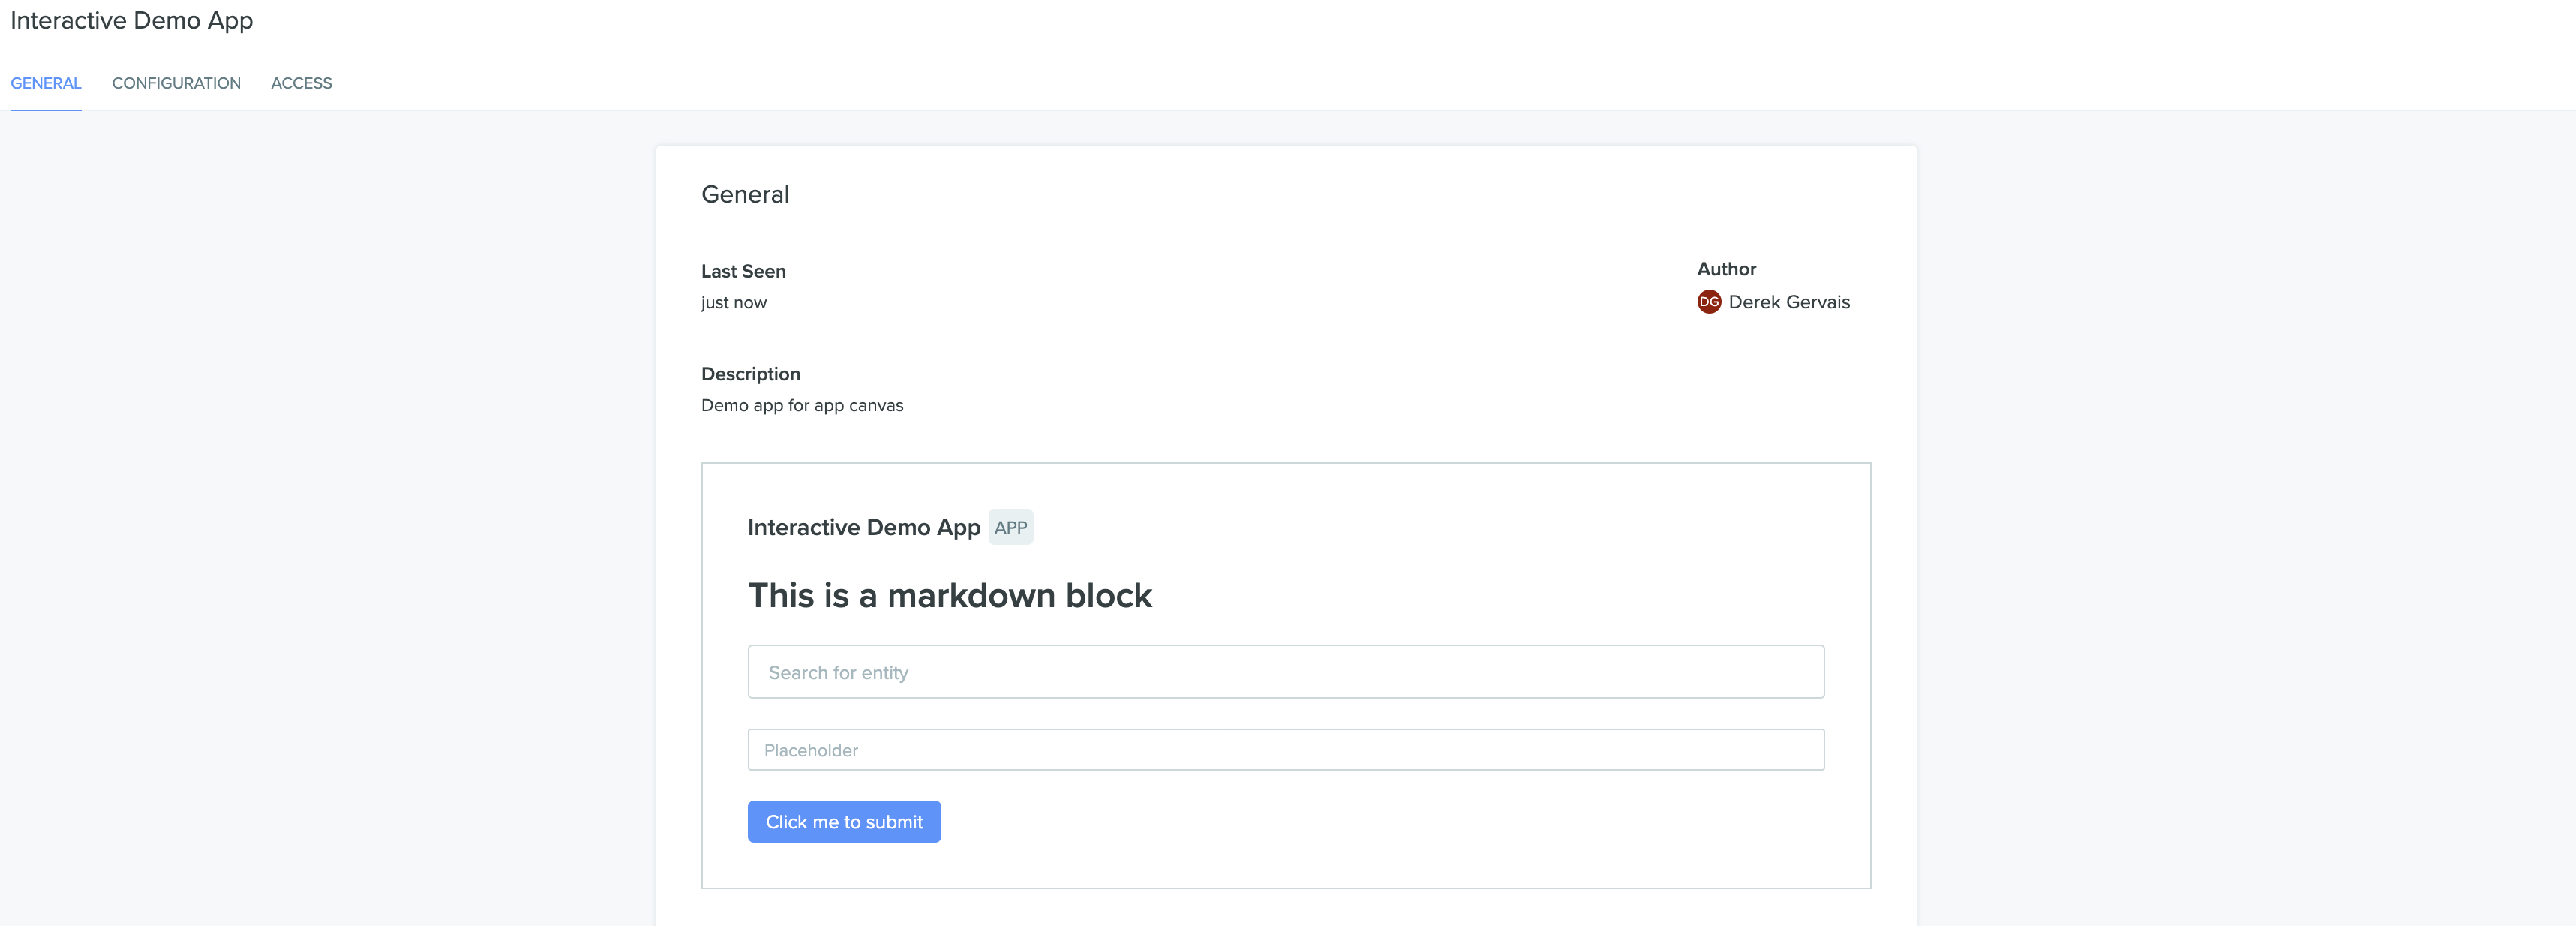
When creating an app homepage feature, the feature ID and app ID must be provided in the featureId and resourceId fields. The resulting canvas will appear in the “General” tab in the app’s homepage:

Canvas Webhooks
An app must acknowledge a canvas webook with a response within 1 second to prevent the UI from timing out, though the app can take longer to PATCH the contents of the canvas. Once the app has received a canvas webhook, it can use the Update App Canvas endpoint to update the canvas blocks. Canvas blocks are processed and rendered in the UI in realtime, meaning Benchling users do not need to wait and refresh to see UI updates.
In addition to the initialization webhook above, other canvas interactions can trigger webhooks. Here’s an example of an button click webhook:
{
  "app": {
    "id": "app_gh8DciACwgm6CtIi"
  },
  "baseURL": "https://piproduct.benchling.com",
  "channel": "app_signals",
  "message": {
    "buttonId": "submit",
    "canvasId": "cnvs_0IYfHKi4",
    "deprecated": false,
    "excludedProperties": [],
    "type": "v0-beta.canvas.interaction"
  },
  "tenantId": "ten_rhp9gje5mg",
  "v
Updating the canvas
Updating an existing canvas involves using the Update App Canvas endpoint to PATCH the canvas blocks that make up the canvas UI. A list of available canvas blocks can be found in Canvas Block Reference (link). Updating an app canvas replaces the existing canvas elements with the content provided in the request body; to append blocks to an existing app canvas, the update should include the new block(s) as well as all existing blocks. Here’s an example of updating the example canvas from before to remove the input elements:
PATCH /api/v2/canvases/:canvas_id
{
    "blocks": [
        {
            "enabled": true,
            "id": "submit",
            "text": "Click me to submit",
            "type": "BUTTON"
        }
    ],
    "enabled": true
}
Updated about 1 year ago
