App Configuration
Introduction
App Configuration allows app developers to include configuration options that enable Benchling users to customize their app experience. Configuration options can include Benchling dependencies like schemas, folders, and projects, as well as generic types like text, integers, and checkboxes. Configuration options can empower Benchling users to get an app up and running, or customize how the app functions without requiring work from the app developer.
Key Concepts
App Workspace
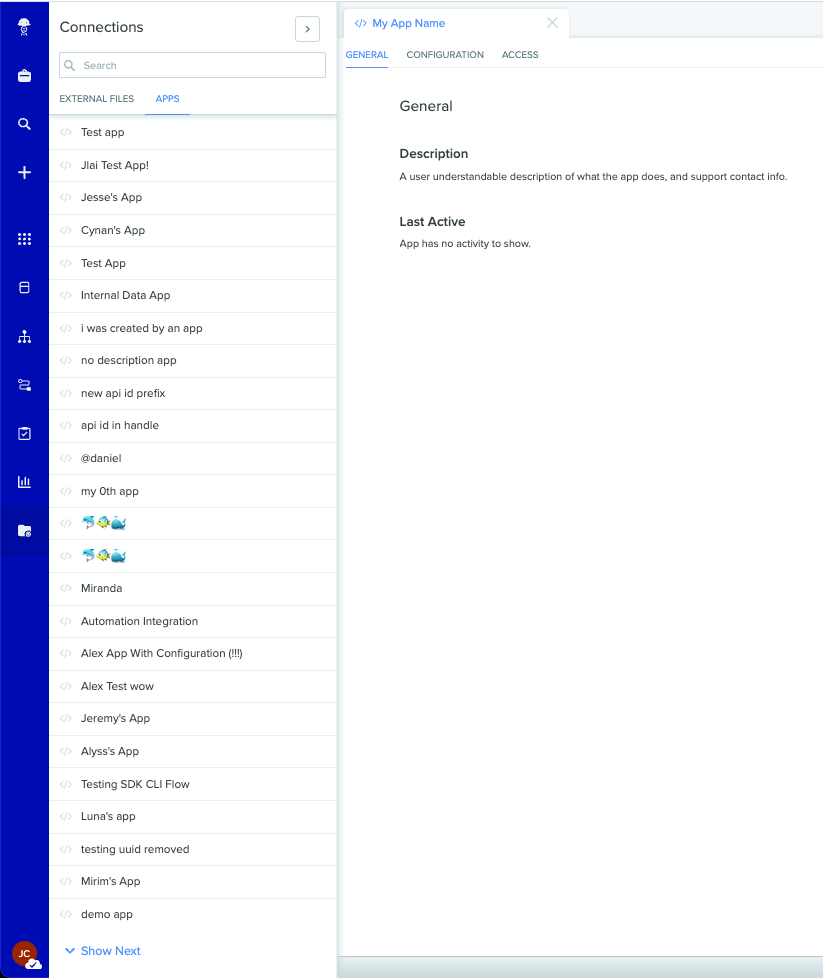
The App Workspace is the public face of an app in Benchling. It can be accessed through the sidebar menu under Connections > Apps.
The App Workspace is where users will be directed anytime they click on the app in other parts of Benchling.
The Configuration and Access tabs are where admins of the app can control the app’s configuration and assess the app’s access to data in Benchling.
All apps have a homepage once created on a Benchling tenant, but only apps that have included a Manifest will have a configuration page.

The Benchling App Workspace with an example app's settings displayed
App Configuration
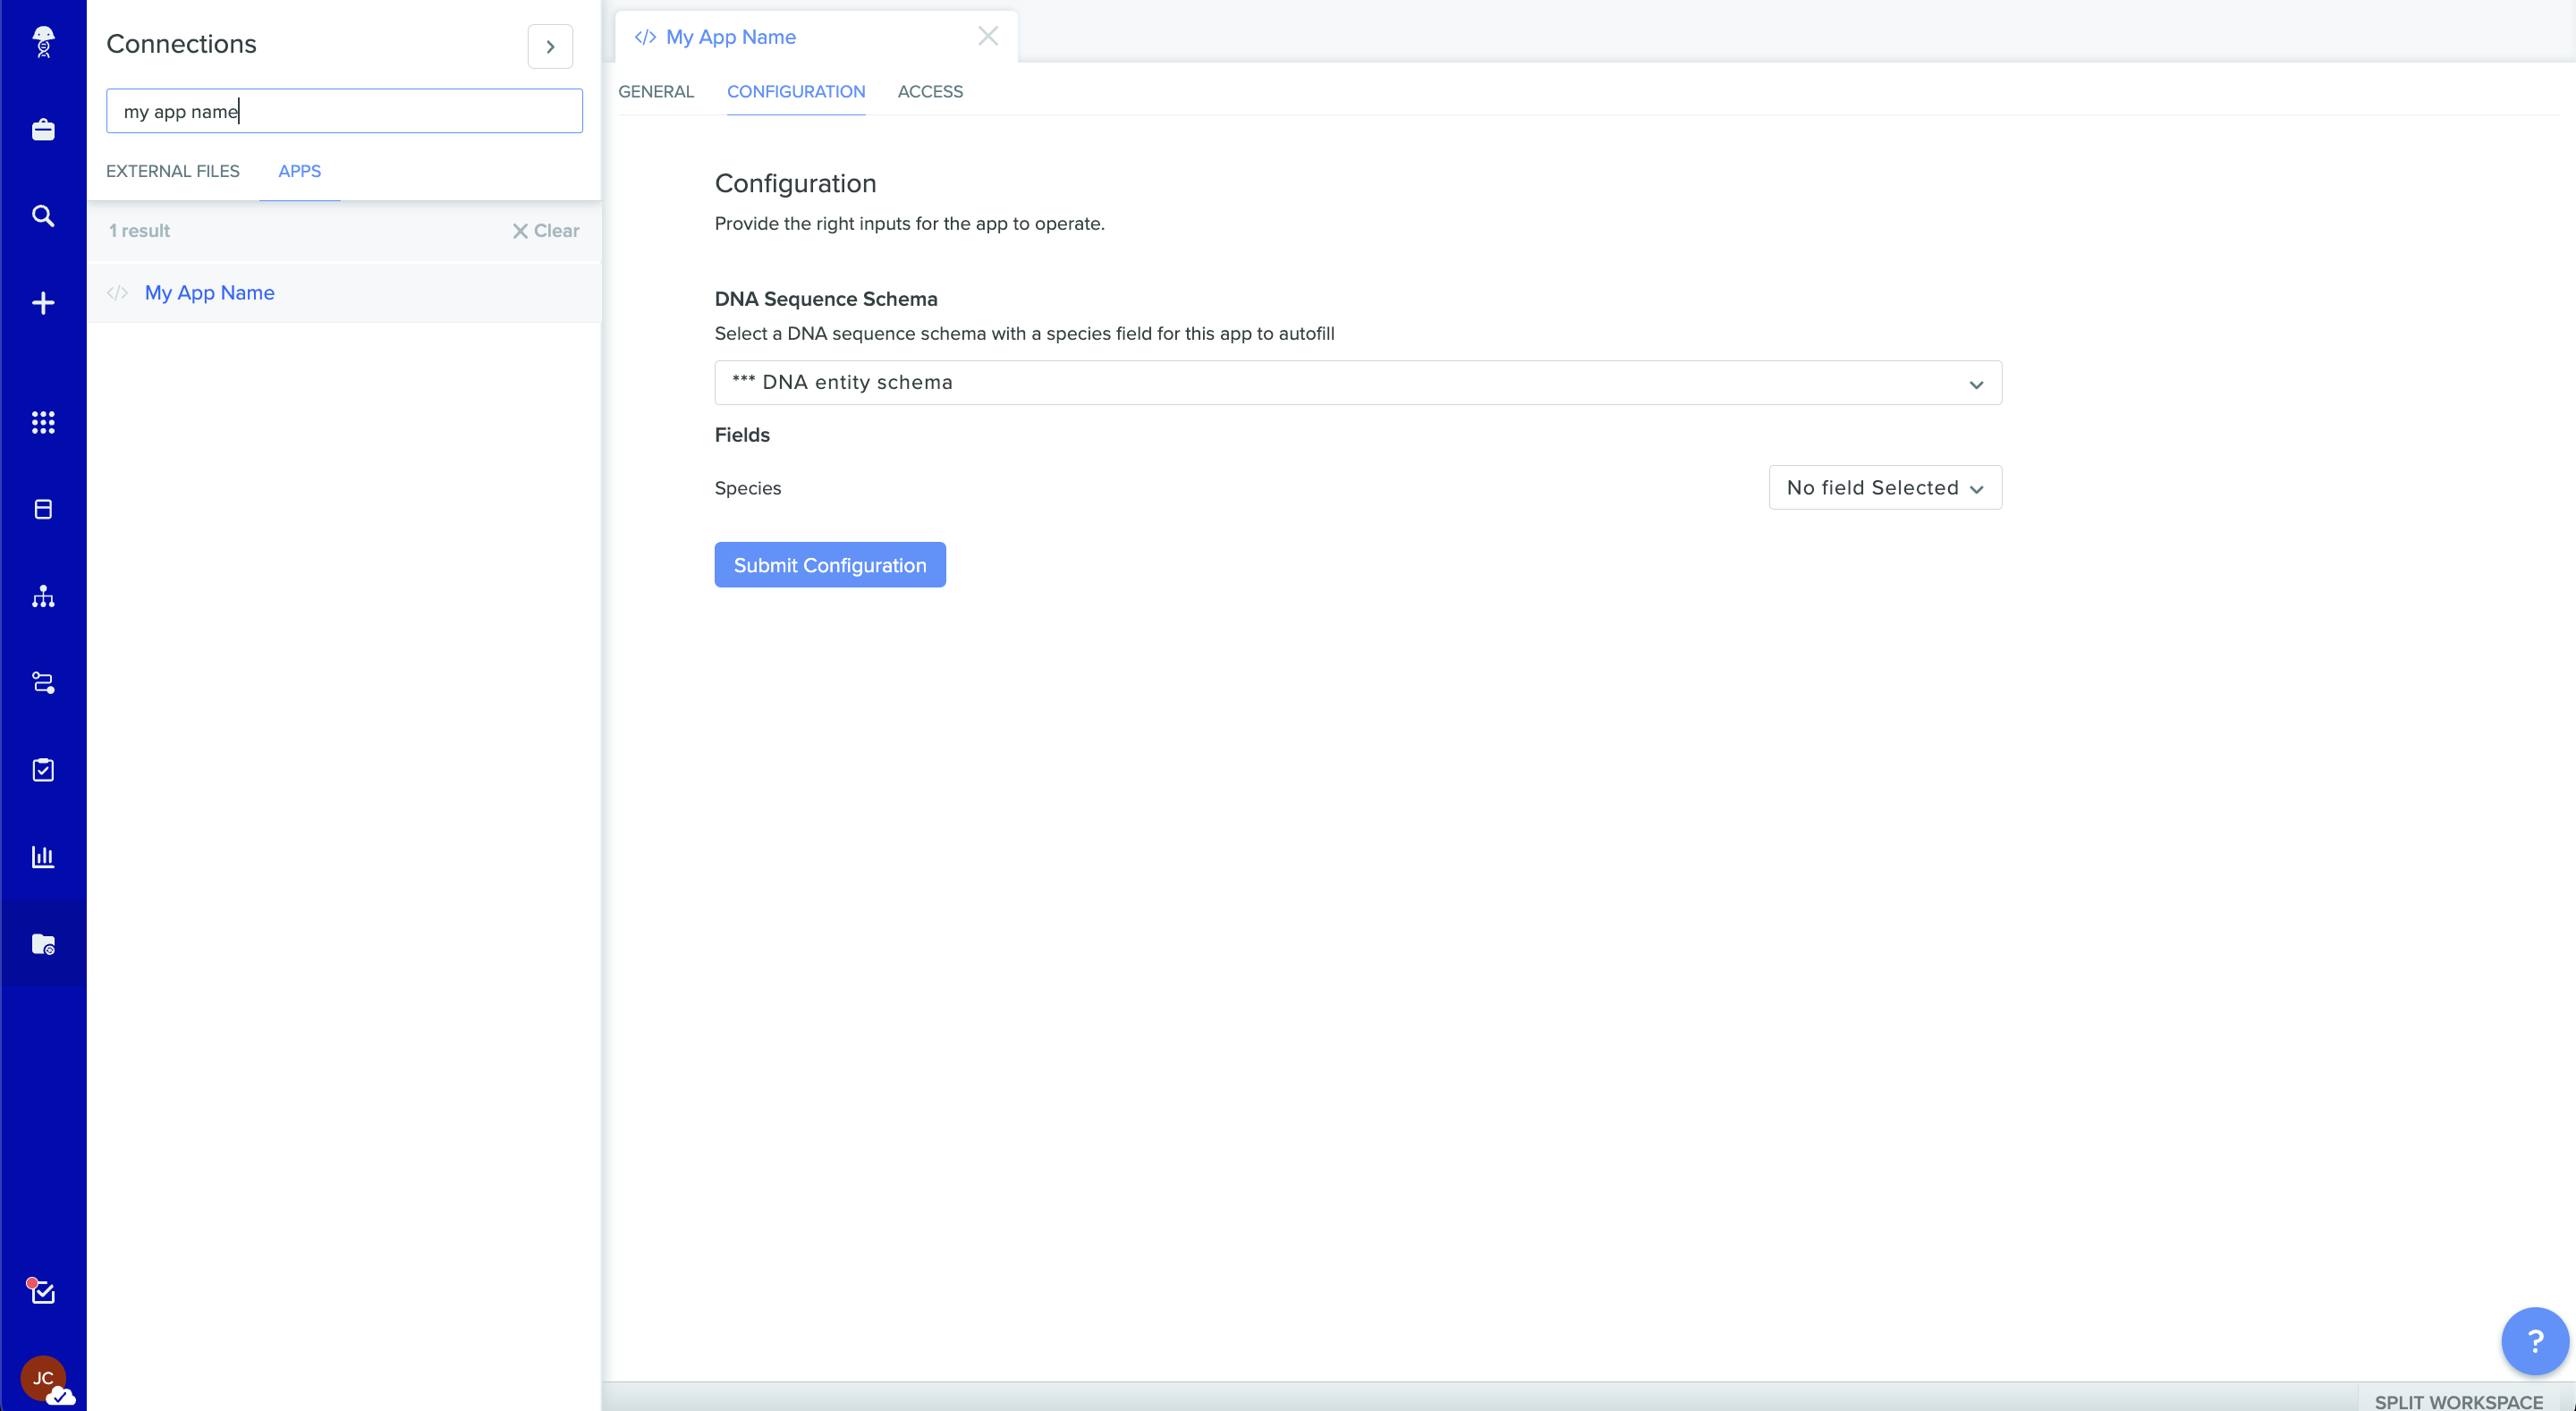
App Configuration includes the configuration options an app developer provides that enable Benchling users to customize their app experience. App developers can define options that allow admins to select schemas, input text, and provide numerous other values. Once an app's configuration is submitted, the configuration values can be queried from Benchling, allowing the app to be built without hard-coding any tenant-specific values.
App configuration is powered by an app's manifest; a yaml file that serves as the environment-independent definition of the app. An app's manifest is usually stored externally, alongside the app code. The app manifest defines the configuration options available to users. In Benchling, App Configuration appears to users in the App Workspace under an app's "Configuration" tab:

For more information on creating a manifest for your app, see our App Manifest Reference
When To Create a Manifest
Developing a Benchling app doesn’t technically require a manifest. Following our Getting Started with Benchling Apps guide or Building your first App guide, you can complete the process of building a Benchling App end to end without using a manifest.
Apps created without a manifest cannot define leverage app configuration, so you should create a manifest if your app will need to provide users with configuration options. Often, determining the configuration details that an app requires to function properly is done after the app has been created in Benchling.
Additionally, an app manifest and configuration is especially useful when you want to install a single app on multiple Benchling tenants. For example, you might want to use the same app on your dev, test, and production environments, or you may want to distribute your app to other Benchling customers.
Distributing an App
Because an app manifest defines all of the details of an app without being tied to a specific Benchling tenant, they're particularly useful for building distributable apps. App developers building a Benchling App to distribute to multiple customers (or across multiple tenants) must work with tenant admins to help them install their app. The app installation process depends on whether an app is configured for AUTOMATIC or MANUAL lifecycle management.
In both cases, the first step involves providing the tenant admin with the app's manifest file, and the app's recommended permissions (see Granting an app access for more info). With this information, the tenant admin can follow the steps in Getting Started with Benchling Apps to create an app from manifest using the provided file.
MANUAL apps
MANUAL appsWith the app created in their tenant, the next step for MANUAL apps is to generate a new client secret and send the relevant details back to the app developer. Specifically, the tenant admin should send the app ID, client ID, client secret, and tenant URL to the app developer using a secure messaging system. For receiving the app details from the tenant admin, consider a shared vault solution like 1Password.
AUTOMATIC apps
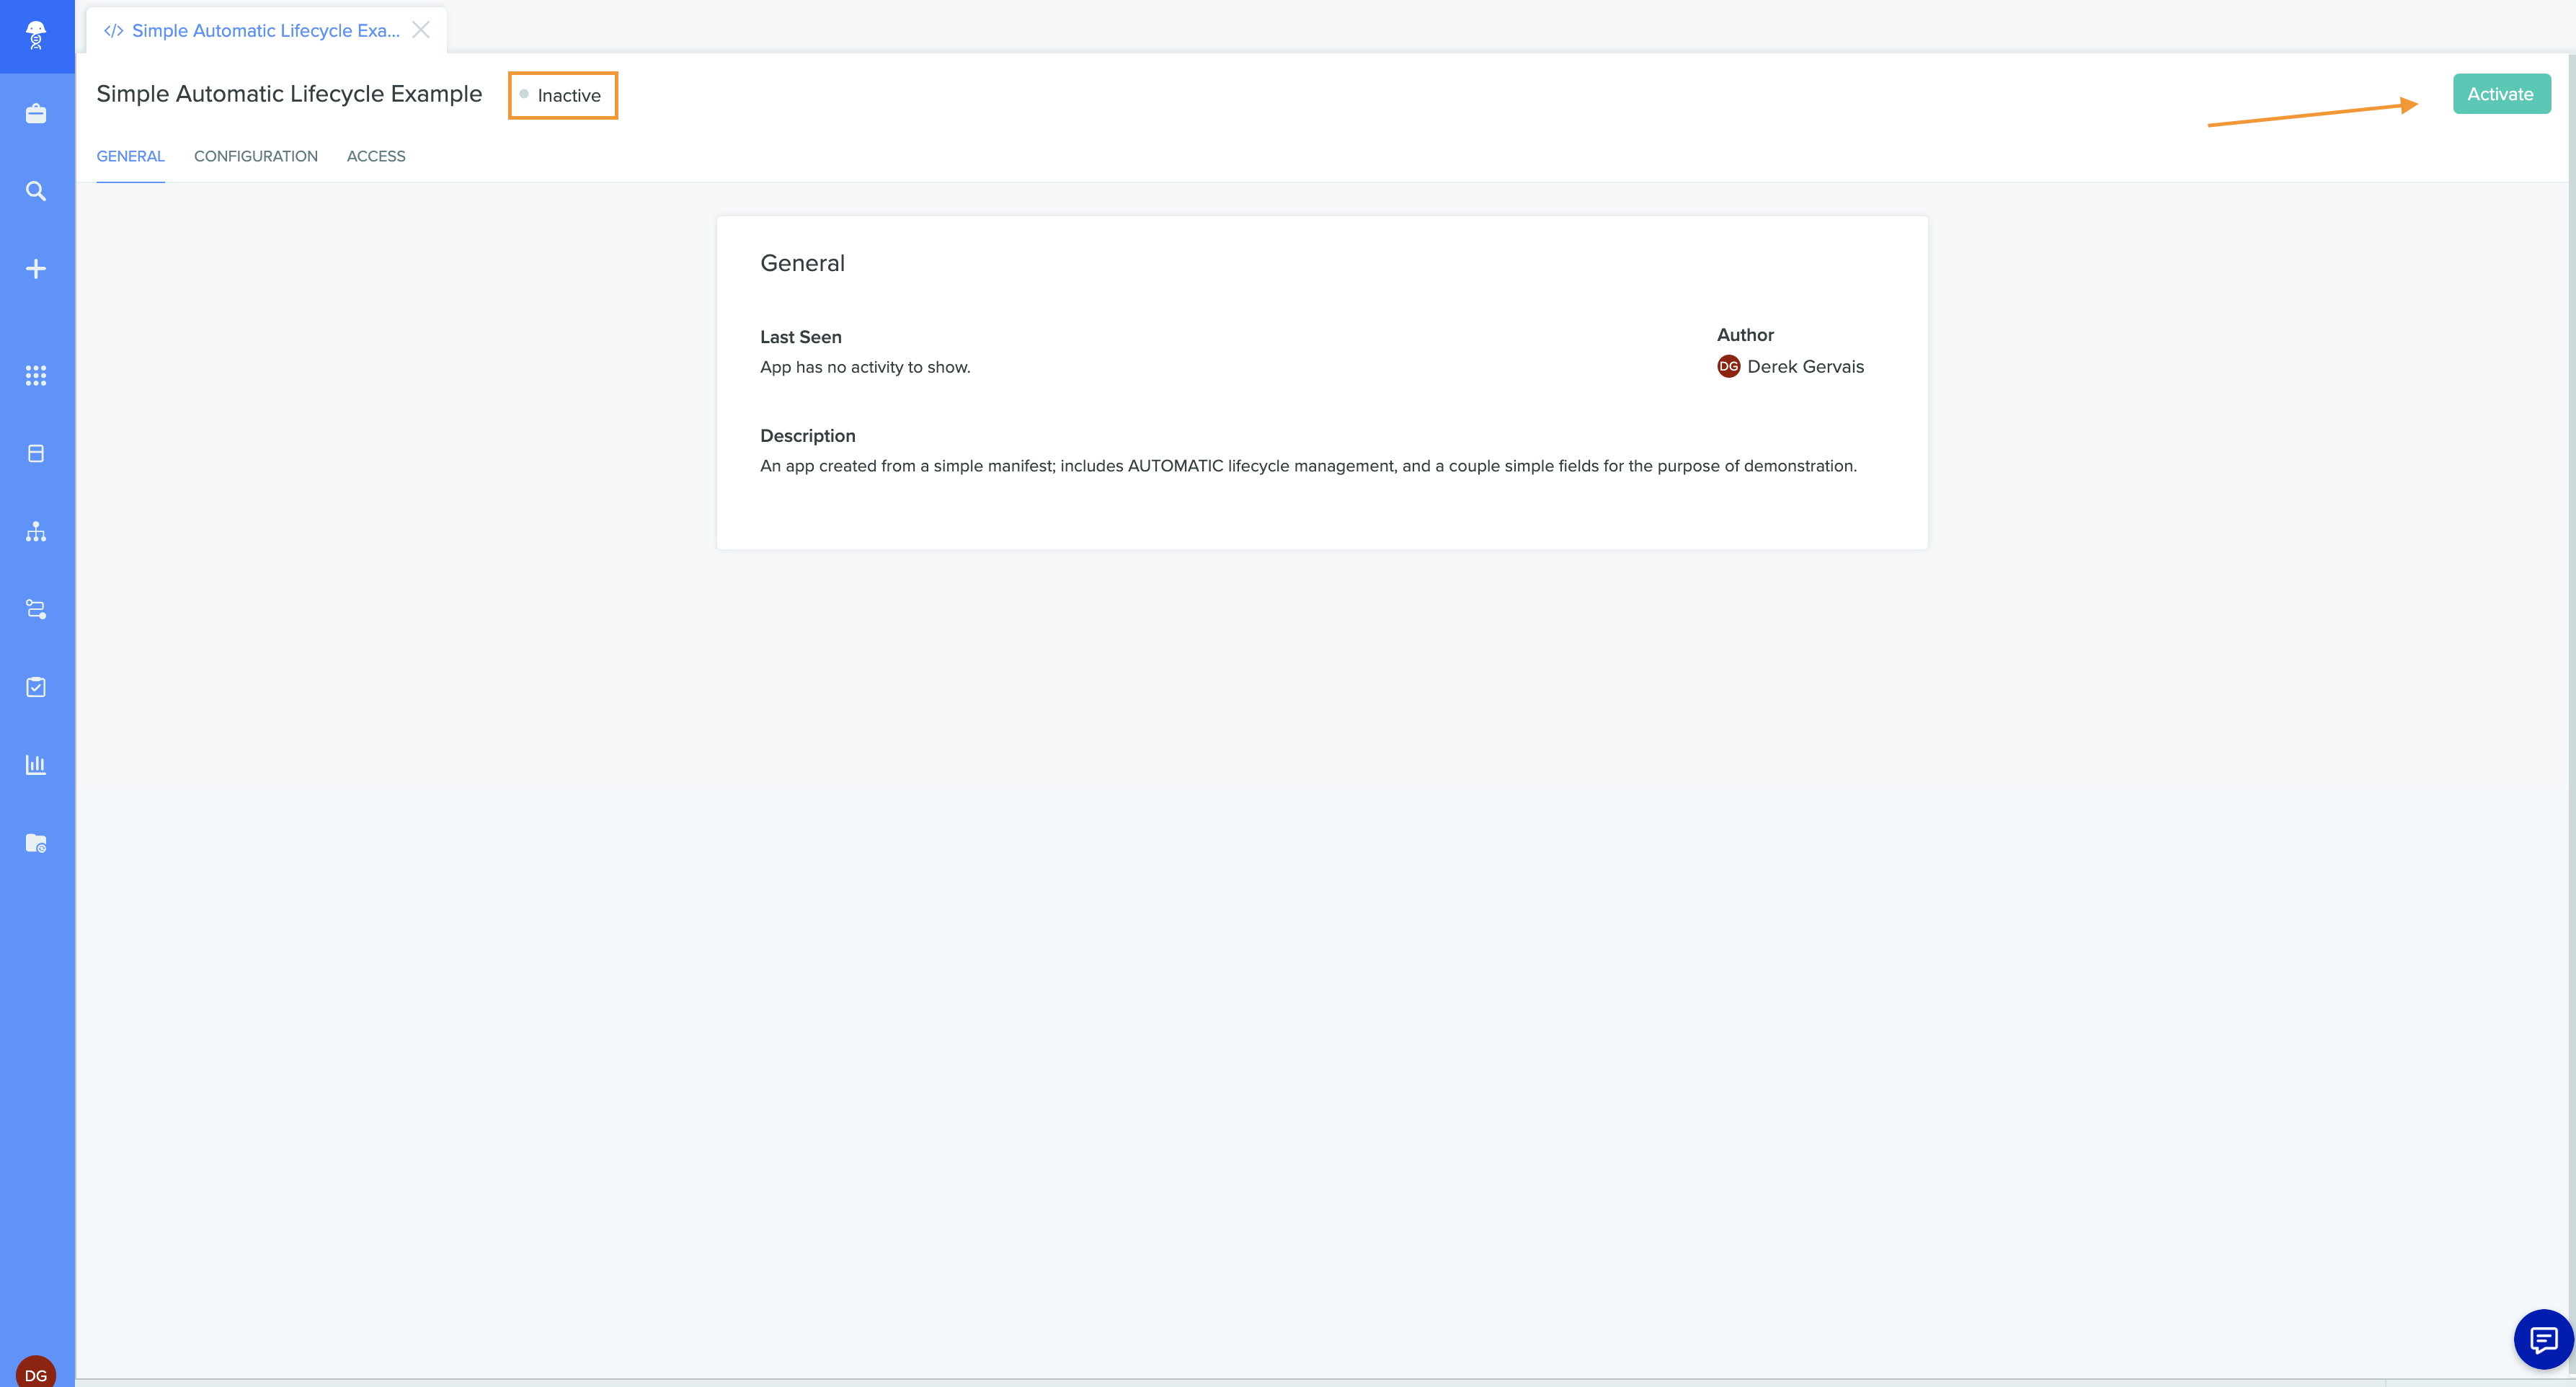
AUTOMATIC appsUnlikeMANUAL apps, AUTOMATIC apps obtain their app credentials via a lifecycle webhook (see Getting Started with Webhooks for more detail). After the tenant admin has created the app from it's manifest, the app exists in an 'inactive' state:

The app homepage for an 'inactive' example app. The 'inactive' status is highlighted, and an arrow points to the 'Activate' button
An inactive app exists in a tenant, but does not trigger any webhooks, and has not had any client credentials created yet. At this point, a tenant admin can give the app the proper permissions and fill out the app's configuration options. Once that's complete, the tenant admin can activate the app by hitting the 'Activate' button. Upon activation, Benchling will send a lifecycle webhook to the webhookUrl defined in the app's manifest, completing the app installation. Check out the Getting Started with Webhooks guide for more details on the lifecycle webhook.
With these steps complete, the app is fully installed and ready to run. To see an example of implementing an app manifest with an existing app, check out our guide to Building your first App Manifest
Updated about 1 year ago
