

Building your first Benchling App
This guide walks through creating and configuring a simple Benchling App in order to highlight the standard permissions and authentication strategies for Benchling Apps. The beginning overlaps with Getting Started with Benchling Apps, so if you’ve already completed those steps, skip ahead to Building the app. By the end, we’ll have an app that reviews newly created or modified DNA entities for a filled-in Species field and updates those with missing values.
You’ll need:
- A Benchling Registry
- A Python development environment with the Benchling SDK installed locally
- Benchling Developer Platform access
- Tenant Admin permissions
Getting access
First, make sure you have access to the “Developer Platform” capability. See Developer Platform access, or the general guide to Capability Management.
Where to find apps
Apps live on the Feature Settings page. There are several ways to get there; the easiest is through your user menu, which takes you to the “Developer Console” section of Feature Settings and opens the “Apps” settings.
Creating an app
Click the “Create” button in the top right to create your first app. You can always change the name and description afterward.
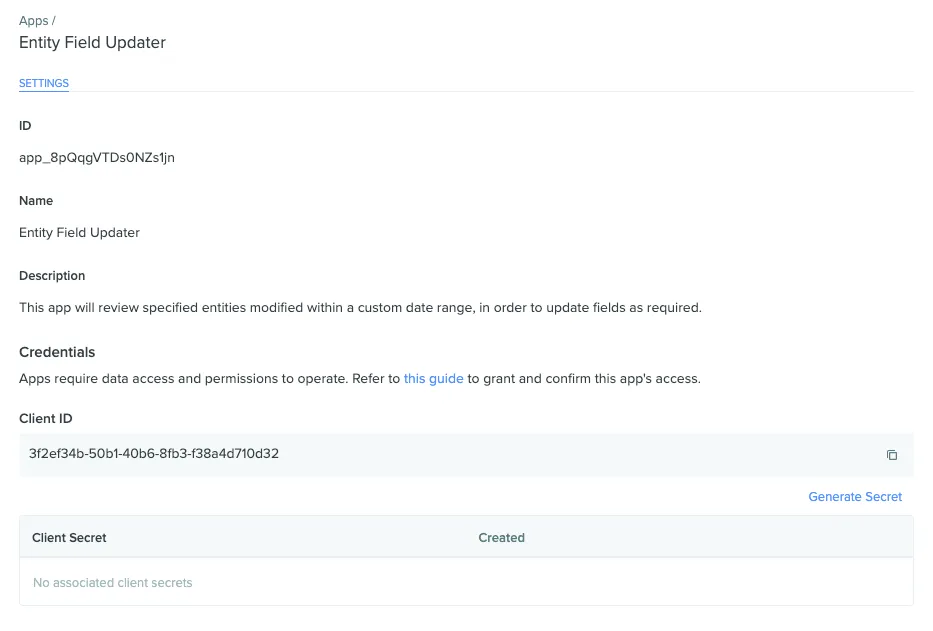
Take note of the Client ID, which is specific to the app, and save it for later. Next, click “Generate Secret” to create the private key for this app.
Do not close this popup yet
Copy the Client Secret for your app to a secure location before closing the modal. Once you close it, the full key will not be accessible again. If you lose this private key, you will need to generate a new one, and the old key will no longer be valid.
Adding an app to an organization
Adding an app to an organization gives the app access to any projects accessible to all members of the organization, as well as the Registry itself. This is generally necessary when creating a new app. Org admins can add apps on the organization page under the “APPS” tab:
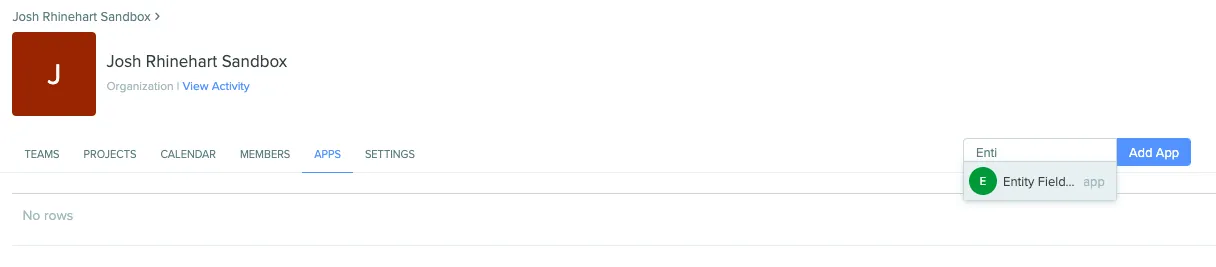
Once added, it appears in the “APPS” tab for that organization:
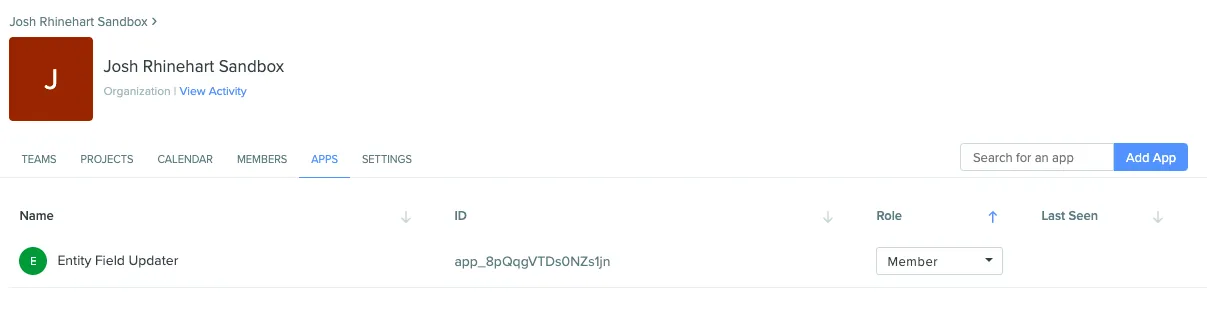
Be aware that your tenant may be configured for Registry control by individual project rather than at the organization level. If you think this is the case, contact your Benchling admin or your Benchling Customer Success Manager.
Adding an app to projects and teams
Once an app is added to the organization, team or org admins can also add apps to teams, which similarly gives the app access to the projects team members can reach. This is useful when managing several apps together (“Automation Apps”), or for apps specific to a certain team (“Developer Team”). The Getting Started with Benchling Apps guide covers these additional permissions.
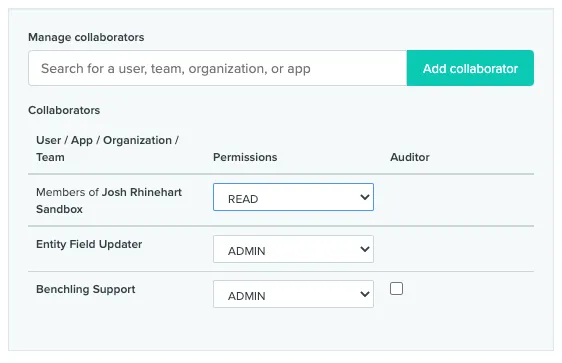
In the example below, the project housing the entities to be updated is configured so that all members of the Sandbox Org have read-only permissions by default, so the ‘Entity Field Updater’ app has been explicitly granted admin permissions within the project.
Building the app
Now that the app exists in Benchling and has the right permissions, it’s time to build it. Because the Benchling Registry is highly configurable, some app actions are necessarily scoped to data models specific to your instance. The general purpose of this app is to fill in missing Species data on recently created or modified DNA sequence entities, but similar logic can sync with an external database or ontology system, perform field validation, or periodically update entities with other relevant data.
We’ll also use the Benchling SDK, which provides a typed interface for the Benchling REST API. Make sure the SDK is installed in your local environment if you want to run this code as shown. See Getting Started with the V2 SDK.
Data model prerequisites
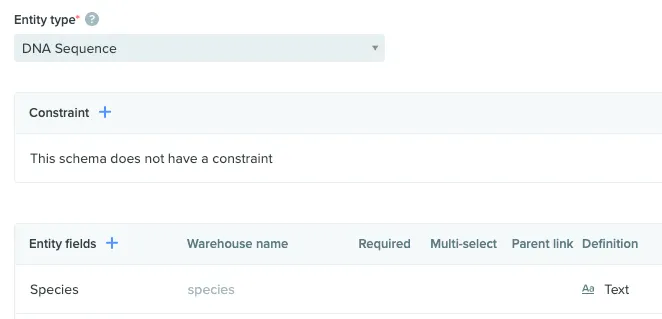
To keep the focus on app development rather than data model design, we only need a single DNA entity schema with a text schema field for Species, as shown below. Once you’ve created this entity schema, or added an appropriate field to a pre-existing entity, take note of the schema API ID, either from the URL or from the Copy API ID button if you’ve enabled that option in your personal settings. We’ll use that schema API ID to filter our API calls.
Authentication
If you’ve used the SDK before, this will look familiar. Instantiating the Benchling
client still requires only your tenant URL and an auth_method, but we use the OAuth2
Client ID and secret from the app creation process rather than an individual user’s API
key.
Retrieving a list of DNA sequences
With the client instantiated, we need a list of recently modified DNA sequences to
verify. Since that list could be long, the SDK’s .list() methods return an iterable
generator rather than the full set of entities, so we can iterate page by page and act
in chunks. The
iterating through pages
guide has more on how the iterator works.
The list endpoint also accepts filter parameters, so we narrow the query to entities of
the schema we care about, and only those with a modified_at timestamp within the last
day. We’ve also raised the page size from the default of 50 to 100 to keep the number of
API calls reasonable.
Iterating through the returned entities
Now we iterate through the returned entities one page at a time, identifying which ones need an update to the Species field. Each entity that needs one goes into an array of updates, along with the key and value of the field to update.
Thanks to how the update endpoints work, we don’t need to provide fields that aren’t being updated, so rather than unpacking the whole entity, we can supply just the registry ID and the changed fields. For simplicity we pick a species at random from a hardcoded array, but this is where you’d call another function or a third-party API.
Bulk update and async tasks
Assuming we found entities with empty Species fields, we now have an updates array of
DnaSequenceBulkUpdate objects, each with the id of the entity to update and a
fields parameter that uses the SDK’s serialization helpers to format the new species
string.
The next step, if updates isn’t empty, is to call the
DNA sequences bulk update endpoint
with our list of updates. All bulk operation endpoints in the Benchling API return a
task ID rather than waiting to send a response, since larger jobs can take longer than a
standard timeout. Through the SDK, .bulk_update() returns an AsyncTaskLink that we
can pass to .wait_for_task() to poll the tasks endpoint for status updates. The
async tasks section of the SDK examples
has more detail.
This block continues the for page in sequence_pages loop from above; the full
reference code is at the bottom of this guide.
All that’s left is to call update_species_bulk(dna_sequences_list) and monitor the
output. In production you could schedule this with a system automation tool like cron
or a serverless environment like AWS Lambda, or upgrade the app to be evented and
trigger off the entity.registered event. See
Getting Started with EventBridge.
Example app full code
As noted above, this app uses the Benchling SDK, which provides a typed interface for the Benchling REST API. Make sure the SDK is installed in your local environment if you want to run this code as shown; see Getting Started with the V2 SDK for more.
Next, building your first app with App Configuration shows how to remove the tenant-specific values hardcoded above.