
Introduction to App Canvas
What is app canvas?
App canvas is a product that allows apps to define custom user interfaces within Benchling. Interactive Benchling apps can use canvas “blocks” to create custom UI experiences in the context of a Benchling scientist's workflow, allowing users to interact directly with the app. Best of all, canvas UIs update in real-time, so no waiting and refreshing the page is necessary to get feedback from a Benchling App.
App canvases can appear in a few different places: in documents (e.g. notebook entries), runs, and on an app’s homepage.
Canvas examples
App canvases are most commonly used to communicate with an external system. For example, when registering an entity in a registry outside of Benchling or importing data from an external database.
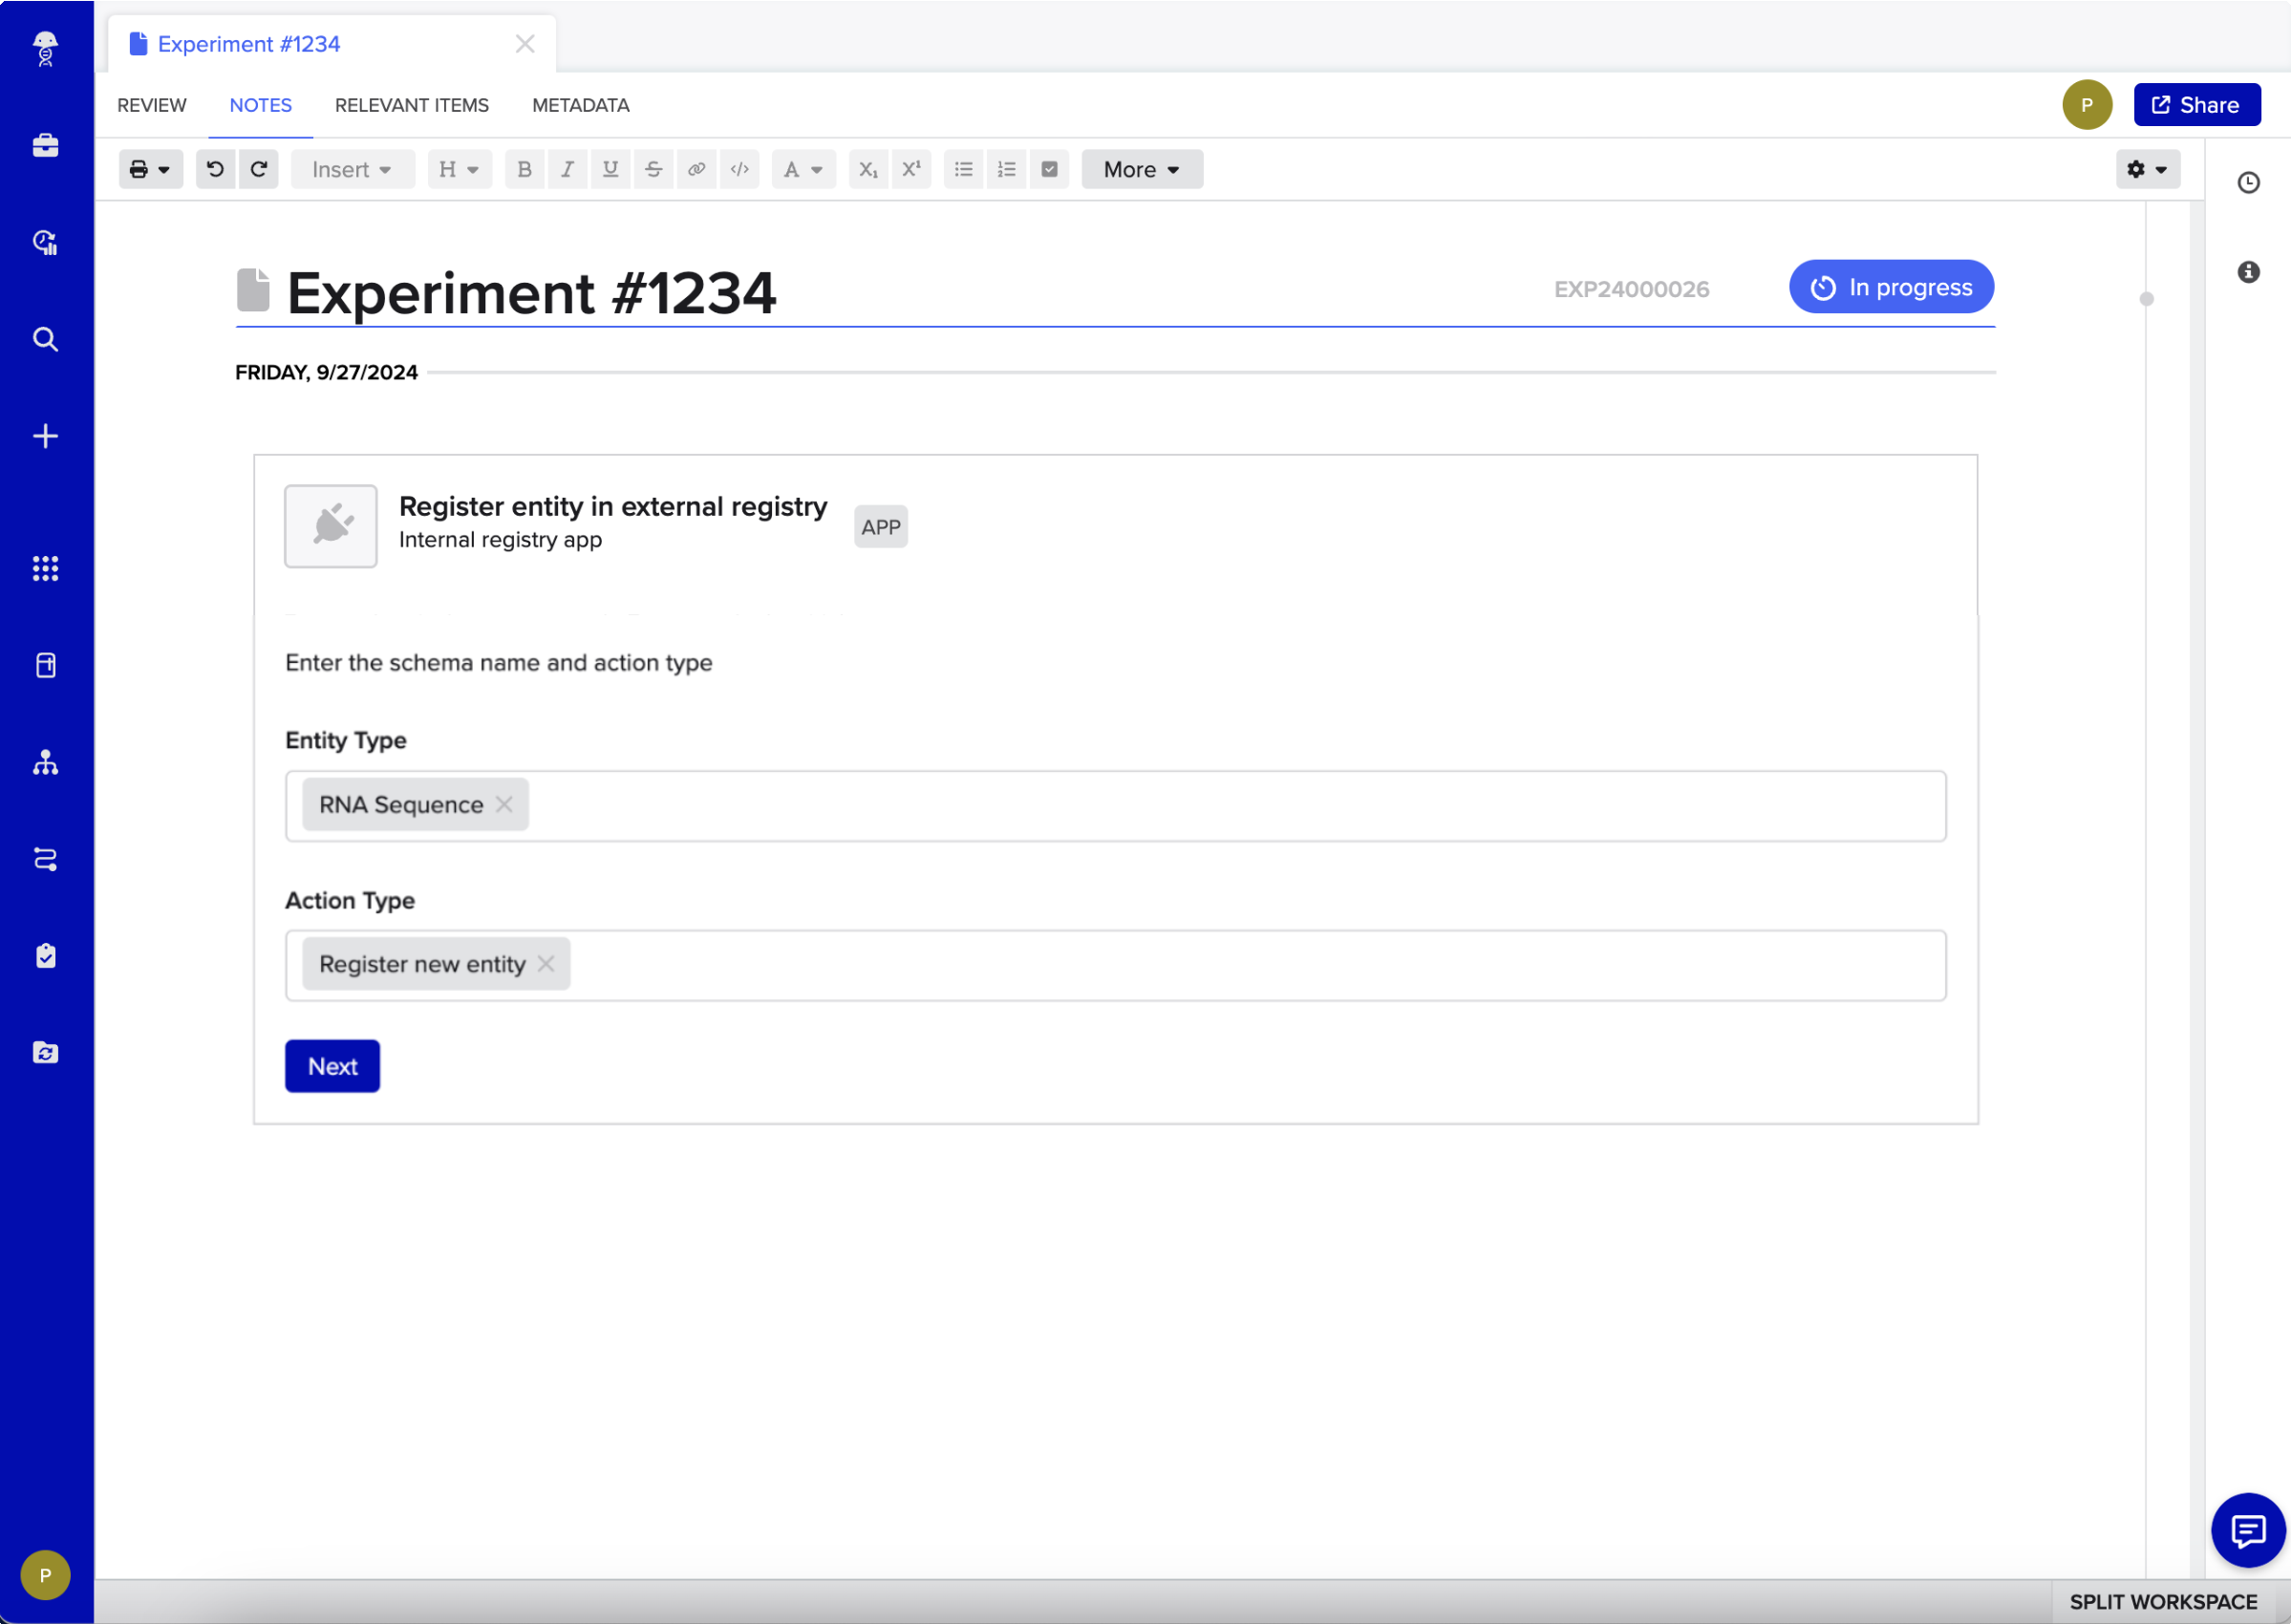
External registration app

PubChem lookup app
App canvases can also be used in combination with any Benchling API action. For example, a multi-step notebook template with conditional logic can be turned into a canvas for a more streamlined user experience.
Additionally, app canvases can bring external steps in a scientific workflow into Benchling. Some examples:
- Validate inputs with custom logic before registering an entity in Benchling
- Clean up and validate data before sending instructions to an instrument
- Generate a report after experiment completion
How to design interactive apps with canvas
A prototypical interactive app has three key design components:
App manifest with features defined
While a manifest isn’t required for all Benchling apps, it is required for interactive apps that leverage a canvas. An interactive app will define some number of “features”, each of which determine where the custom UI will be provided by the app. Distinct features typically serve distinct purposes, and an interactive app can define as many (or as few) features as appropriate.
Public webhook endpoint
Webhooks are a key component of interactive apps; canvases trigger webhooks on button clicks. Apps using canvases must therefore be able to receive webhooks from Benchling; check out our Getting Started with Webhooks guide for more details.
Application logic for interacting with canvas
Interactive apps define custom user interfaces using canvas blocks, and use the Canvas API to update the canvas contents. Benchling then renders the components in the canvas in real-time. Apps must be capable of responding to canvas webhooks by querying and updating the canvas(es) in question to produce the desired user experience.
How to use app canvas
Benchling App Python Examples GitHub repoWe recommend cloning the
chem-sync-local-flaskproject from our public app examples repo to get started with building an app canvas app.
To use app canvas, your app must be created from an App Manifest. An interactive app must define at least one feature. Generic canvases can either be rendered in any location where canvas is available, or it can be limited to specific locations.
There are two special cases of app canvases which can only be rendered in their designated location:
- The
ASSAY_RUNfeature type introduces a canvas to an interactive run. - The
CANVASfeature withlocations: [APP_HOME]introduces a canvas to the app’s homepage.- Note:
APP_HOMEPAGEis deprecated. New manifests should use the schema above instead.
- Note:
An app's features as defined in the manifest might look like this:
features:
- name: Generic Canvas
  id: test_generic_canvas
  type: CANVAS
  locations:
    - ENTRY
    - ENTRY_TEMPLATE
- name: Interactive Run Canvas
  id: test_interactive_run_feature
  type: ASSAY_RUN
- name: App Homepage canvas
  id: test_app_homepage_canvas
  type: CANVAS
  locations: [APP_HOME]
The following fields are required:
- The
namefield is the user-facing name of the feature - The
idfield is the app-defined unique identifier for the feature - The
typefield denotes which feature is available
The following field is optional:
- The
locationsfield specifies where a generic canvas should be available. This field is only supported when the feature type is CANVAS.- Valid values are
ENTRY,ENTRY_TEMPLATE, andAPP_HOME. If locations is unspecified, the canvas is available in all locations except the app homepage. WhenAPP_HOMEis specified, it must be the only value. Combining it with other locations is invalid and will throw a manifest error.
- Valid values are
An app manifest may define any number of
CANVASorASSAY_RUNtype features, but at most oneCANVASfeature withlocations: [APP_HOME]. Only one homepage canvas per app is supported. MultipleCANVASfeature withlocations: [APP_HOME]would imply multiple canvases on this workspace page, which we do not currently support.
Required Subscriptions
In order to receive webhook messages that are sent through a canvas's lifecycle, the app manifest must also declare a subscription to the sent messages.
If the manifest declares at least one ASSAY_RUN feature types, then it must include these subscriptions:
subscriptions:
  deliveryMethod: WEBHOOK
  messages:
    - type: v2.canvas.userInteracted
    - type: v2.canvas.initialized
If the manifest declares at least one CANVAS feature type, then it must include these:
subscriptions:
  deliveryMethod: WEBHOOK
  messages:
    - type: v2.canvas.userInteracted
- type: v2.canvas.createdMigration note: Apps previously relying on
v2.app.activateRequestedas a workaround for homepage canvas initialization should migrate to thev2.canvas.createdsubscription. Apps that already subscribe tov2.canvas.createdfor other canvas types should ensure their handler distinguishes homepage canvases by checking withfeatureIdin the webhook payload to avoid collision with existing create logic.
A manifest that contains both ASSAY_RUN and CANVAS features must have subscriptions to v2.canvas.initialized , v2.canvas.userInteracted and v2.canvas.created
Canvas creation and initialization
Installed apps with a CANVAS feature will appear in the canvas picker in the locations where the canvas is made available.
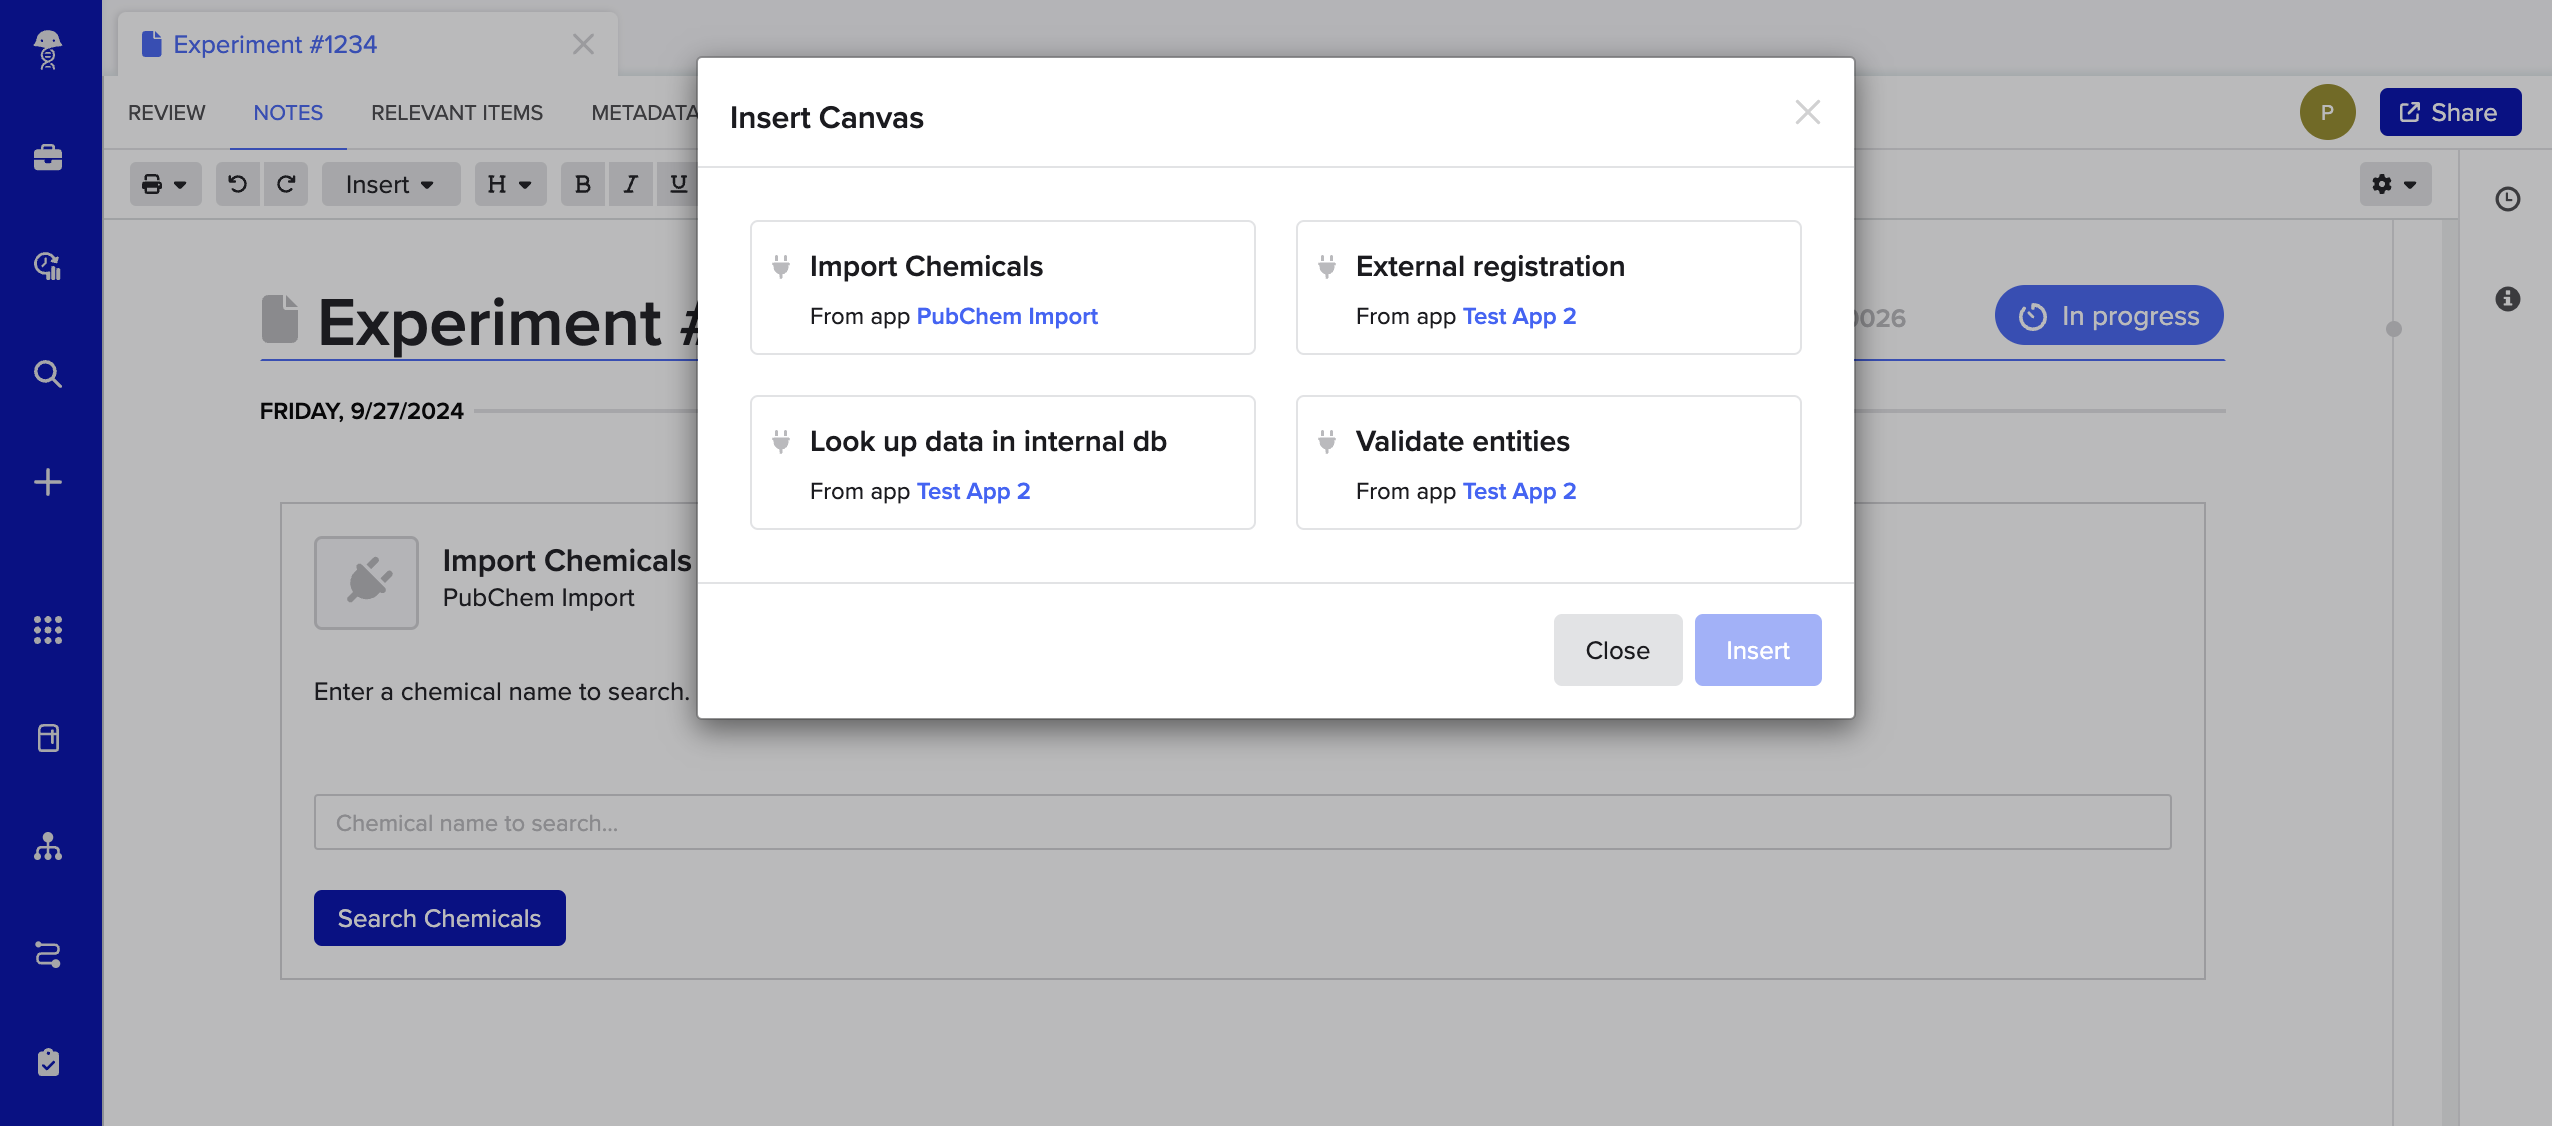
Canvas picker in Notebook
Upon selection, a canvas container is loaded into the notebook. When the user clicks "Create", we send a v2.canvas.created webhook to the app's webhook url.
With an ASSAY_RUN feature defined, admins will have the ability to select run schemas where the canvas will appear. This option can be found in the app’s configuration interface; for interactive runs, the user will be able to select a number of run schemas where they would like the UI to render:

For assay run canvases, a v2.canvas.initialized webhook is triggered when an instance of a relevant run schema is created in a notebook entry.
Homepage canvases appear on the General tab of the app in the App Workspace. When a user clicks "Create", the platform creates the canvas and sends a v2.canvas.created webhook to the app with a pre-generated canvas_id. The app should respond by PATCH-ing the canvas with its initial UI blocks using the Update App Canvas endpoint.
After receiving a canvas created webhook, an app must create an initial canvas using the Create an App Canvas endpoint. A canvas initialization webhook looks like this:
{
    "version": "0",
    "baseURL": "https://subdomain.bnchdev.org",
    "tenantId": "ten_XXXXXXXXXX",
    "app": {
        "id": "app_XXXXXXXXXXXXXXXX"
    },
    "appDefinition": {
        "id": "appdef_XXXXXXXXXX",
        "versionNumber": "0.0."
    },
    "channel": "app_signals",
    "message": {
        "deprecated": false,
        "featureId": "test_interactive_run_feature",
        "resourceId": "51a09c87-72f1-4f44-a34c-8b29ca39cf30",
        "type": "v2.canvas.initialized",
        "userId": "ent_XXXXXXX"
    }
}
Importantly, the initialization webhook will include a featureId corresponding to the feature id defined in the app manifest.
Assay run and app homepage canvases also include a resourceId indicating the public API identifier of the Benchling resource on which the interaction is happening in the Benchling UI. Both of these properties will be required when the app POSTs an initial canvas.
In the above example, the ASSAY_RUN type feature with ID test_interactive_run_feature from our earlier example manifest was triggered, and so the resourceId in the payload is an assay run ID. If instead a homepage canvas feature (CANVAS with locations: [APP_HOME]) had been triggered, the resourceId in the payload would be the app's API identifier.
Resetting a Homepage Canvas
Homepage canvases now support a reset operation that restores the canvas to its initial state. This is useful for recovering from a stuck or unresponsive canvas caused by webhook delivery failures.
Resetting a canvas clears all existing UI blocks and sends a v2.canvas.created webhook to the app, prompting it to reinitialize the canvas. The canvas_id is preserved after reset.
Reset is only available for homepage canvases (CANVAS feature with locations: [APP_HOME]) and only after the canvas has been successfully created.
ACK webhooks quickly!An app must acknowledge a canvas webook with a response within 3 seconds to prevent the UI from timing out, though the app can take longer to
POSTorPATCHa canvas. We recommend queuing up the webhook body for asynchronous processing downstream and responding immediately to the webhook. Canvas blocks are processed and rendered in the UI in real-time, meaning Benchling users do not need to wait and refresh to see UI updates.
Interaction Webhooks
In addition to initialization webhooks, users interacting with app canvases will also trigger webhooks. Here’s an example of a webhook triggered by a user clicking a button in a canvas:
{
    "version": "0",
    "baseURL": "https://subdomain.bnchdev.org",
    "tenantId": "ten_XXXXXXXXXX",
    "app": {
        "id": "app_XXXXXXXXXXXXXXXX"
    },
    "appDefinition": {
        "id": "appdef_XXXXXXXXXX",
        "versionNumber": "0.0.1"
    },
    "channel": "app_signals",
    "message": {
        "buttonId": "my_button_id",
        "canvasId": "cnvs_XXXXXXXX",
        "deprecated": false,
        "featureId": "test_interactive_run_feature",
        "type": "v2.canvas.userInteracted",
        "userId": "ent_XXXXXXX"
    }
}
Interaction webhooks allow the app to respond to user input and update the canvas in real-time. Updating an existing canvas involves using the Update App Canvas endpoint to PATCH the canvas blocks that make up the canvas UI. A list of available canvas blocks can be found in the App Canvas Block Reference.
Updating an app canvas replaces the existing canvas elements with the content provided in the request body; to append blocks to an existing app canvas, the update should include the new block(s) as well as all existing blocks. Here’s an example of updating the example canvas from before to remove the input elements:
PATCH /api/v2/app-canvases/:canvas_id
{
    "blocks": [
        {
            "enabled": true,
            "id": "submit",
            "text": "Click me to submit",
            "type": "BUTTON"
        }
    ],
    "enabled": true
}
App permissions for creating or updating canvases
After creation, apps always have access to instances of their own canvases if the feature type is CANVAS. No special permissions are required.
In order for an app to be able to create and updateASSAY_RUN canvases it needs read access to the Run Schema the canvas is associated with.
Apps are always permitted to read themselves, so Homepage canvases require no additional permissions
Updated 3 months ago